Data Storage Adventures – With UGreen NASync 4800
Part 4: Data Migration using ROBOCOPY (or don’t let a GUI do what a command prompt can do better…)
Time for the bit that everyone loves – data migration.
- Part 1: Some Background and “Why Now?”
- Part 2: Which NAS to go for? Some thoughts and design work
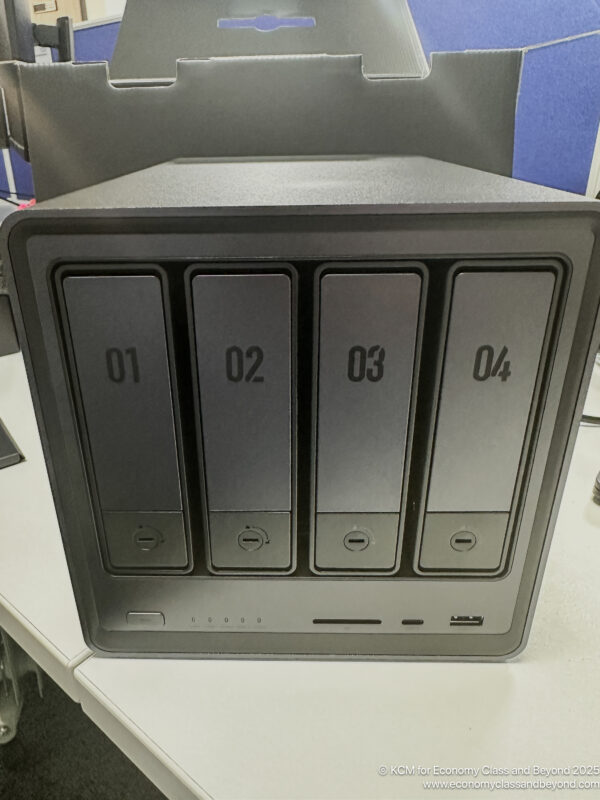
- Part 3: Building, Configuring and Deploying the UGreeen NASync DXP 4800
- Part 4: Data Transfer Tips and Tricks
- Part 5: Making this storage monster grow
- Part 6: Backups still matter, along with some more background reading
DISCLAIMER
Before I go any further, it’s time for the annoying part of disclaimers and whatnot.
Whilst I’ve tested these instructions in various test harnesses and situations, your situation will be different from mine, and you WILL have to tweak the commands to your needs.
These instructions are provided on an “as-is” basis, with any warranty offered or implied, and are used AT YOUR OWN RISK.
In other words, if you use these instructions and it deletes your data, don’t come crying to me.
AND HAVE A BACKUP.
I hate GUIs…
After years of on-and-off transferring data, you would think I would know to trust a layered GUI (such as Apple’s macOS or Microsoft’s Windows) to transfer data by now.
And whilst the macOS copy is sometimes ok with its resumable copying is a wonderful thing, even on a NAS-to-NAS copy (although I’d like a lot more granular data on what’s happening and where it is in the copy process), it has its faults.
With the Drobo and some of the network drops whilst copying with macOS… nope. This data transfer was turning into an exercise in pure and utter pain. After a day or two of this, I gave up copying data that way.
To make things less painful, I grabbed a Windows device from the pile at home. After reconnecting to the home network, I linked the two SMB Shares up, mapped network drives (because typing in IP Addresses is hard) and reminded myself of how to use RoboCopy (or Robust Copy).
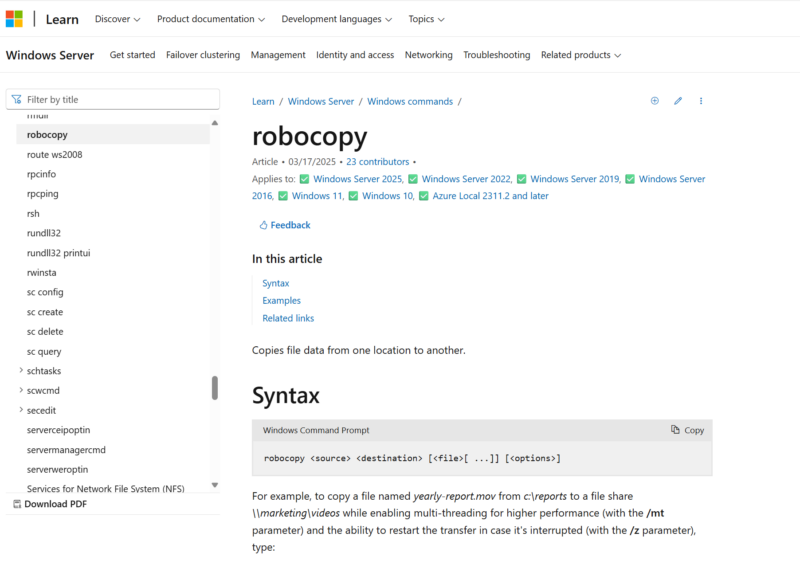
The full Microsoft instructions are at https://learn.microsoft.com/en-us/windows-server/administration/windows-commands/robocopy. It is worth more than a read, and before trying it out, and then testing it on data you don’t need to worry about (or a copy of your data if you so wish).
Always test, before doing something that can affect your data.
I wrote a simplified version when I set up my Drobo some years ago, and this is what I’ll be following.
The main command I used was:
ROBOCOPY "C:\PHOTOS" "D\:BACKUP" /s /copy:DAT /w:0 /r:0
Or variants of that to copy parts of my data at a time.
Whilst I’d normally switch on the logging, I skipped this time as I needed to get the data over from the Drobo to the UGreen NAS. I adapted this to copy major sub-directories in my NAS’s Directory, and started to pad out the disks. Besides, it was easy to also re-run the command to ensure there were no failures afterwards.
It was also time for me to do a little data cleansing, knocking out duplicates that were being copied.
The problem is that I’m limited by network bandwidth. Whilst the UGreen NAS can run at 2.5 Gbit Ethernet, the rest of my infrastructure is running at 1 Gbit – including the source Drobo. Thus, I’m constrained on network speed (well, at least until I invest in a 2.5 Gbit switch and start decommissioning stuff that runs 1 Gbit only).
I ran multiple copies at once, so bandwidth between the devices is saturated (rather than just one copy at a time), as the files I’m copying are comparatively small (with a disk spinning up speed, then slowing down as it moves onto the next file).
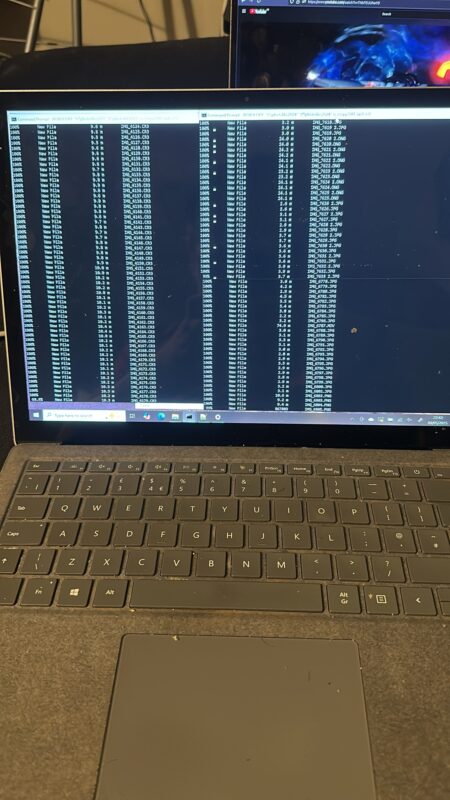
And judging by the background, one of the Eurovision Semi-finals was on.
My definition of “small” is different to some, with a “small” file being under 50Mb (and that’s possible with some of the RAW files the iPhone 14 Pro creates. The Canon Digital CRAWs are well-behaved in comparison (although if you twiddle the dials, you can get massive files out of a camera without trying).
If you want to test this, try copying 100 individual pictures onto a USB stick, then trying to copy a compressed archive of those 100 images. You’ll find that the zipped file moves faster.
In the first part of the copy, I copied my old content from 1998 to 2008 manually over by macOS. When I switched to ROBOCOPY later in the process, I found out that macOS didn’t copy everything during the crashes.
So I re-ran the copies manually.
After that, it was a matter of copying data year by year, as my photography had spiked heavily during those years. Due to the nature of the copy, some years were quicker, normally those with larger files inside them, whereas years with smaller files took forever to copy (and the less said about the lost years’ data between 2014 and 2016, the better… that was a hard lesson).
With the basic data to 2014 copied, I worked backwards to ensure my most recent data was safely copied over, with a year’s worth of data generally being copied over a day. But it does mean leaving a computer on 24/7 to copy the data.
Alternative options
Whilst I could have used the UGreen file manager software to copy the data, it is… basic by its nature. ROBOCopy gives at least some advanced features to ensure that file collisions are managed appropriately.
For Linux-like Operating Systems, rsync is your friend. With equally devlish command options and switches and plenty of room to damage things (just like Robocopy). Grsync provides a GUI layer for those who are afraid of command-line prompts. I’ll be playing with this in the near future as Windows 10 support prepares to vanish on the 14th of October.
For Windows Fans, there are a plethora of other Windows copy tools out there to help you. Such examples include:
- ChoEasyCopy https://github.com/Cinchoo/ChoEazyCopy (MIT Licence)
- FastCopy https://fastcopy.jp/en/ (GPL)
- Teracopy http://codesector.com/teracopy (Freemium)
- UltraCopier – http://ultracopier.first-world.info/ (GPL)
I’ve used FastCopy and found it to be basic, but it does the job. If you’re uncomfortable using RoboCopy, this is a good start. The rest I’ve played with – but have no thoughts either way on them.
For macOS, I have no idea. All I know is pain. And it’s not pain I wish to deal with on an hourly basis.
How long did it take?
In total, it took 9 days to complete a 12.5 TB dataset copy (on and off), with 2 TB remaining on the RAID.
Once I was assured all the data made it over, I ran a script with all the robocopy commands I punched in, to ensure that every kb of data I wanted to keep had a new home. That took another day to cover my backside and know that things are working as intended.
This is a variant of
ROBOCOPY "C\:PHOTOS" "D\:BACKUP" /s /copy:DAT /v /fp /w:0 /r:0 /tee /log:"C:\TEMP\FileCopy.txt
Whilst I have 2 TB free on the NAS, in realistic terms, I’m just under 400 GB of spare space before I hit the 10% alarm of free space.
For me, that’s one trip, or a few days out with either camera. That represents a new problem, as well as a solution to work on.
Next:
To quote Rita Repulsa of Mighty Morphin Power Rangers fame, MAKE MY MONSTER GROW! Expanding the UGreen NAS with its Third Hard disk.
Welcome to Economy Class and Beyond. Your no-nonsense guide to network news, honest reviews, in-depth coverage, unique research, as well as the humour and madness I only know how to deliver.
Our Social Media pool has expanded. You can find us across most networks as @economybeyond on BlueSky, Threads, Mastodon and Instagram!
Also, remember that we are part of the BoardingArea community, bringing you the latest frequent flyer news from around the world.
Hi – Rsync is also already on MacOS via the terminal. Though it’s always best to pick what one is comfortable with for jobs where getting it wrong is expensive.
Thanks for Economy Class and Beyond.
cheers
I would still recommend Unraid as the easiest and cheapest solution – easier than your current trial. I too used Synology plus Qnap plus WD plus Win11; and agree with your comments – too complicated and expensive. Buy a used (up to say 5 year old computer with a motherboard that supports m.2 drives – I use Asus Prime B250 from 2017 for example making sure that the computer case is large enough for 4 HDD’s drives plus the 2 m.2 drives = 6 drives the limit for the $50 Unraid software required. You can get such computers for $100 max; just remove the existing drives (except m.2’s) and GPU (since Unraid does not need a GPU). Unraid uses parity for your 4 array drives (your storage of 1 parity and 3 data) and RAID 1 for your 2 cache m.2 drives (your high speed data transfer connection of 3500+ to keep up with your network speed). Your parity drive has to be the largest you will use. I use 4x4TB HDD’s so have 3×4=12TB of data storage. Parity works with any size drive (less than the size of the parity drive itself) so you can start with anysize data drives that you have lying around or get used one cheap so for a 4TB parity drive then 12GB is the max unless you get a unlimited Unraid and a bigger computer case. Or start with a 6Gb parity (max is then 18TB) etc. Right now the 4TB ex datacenter used HGST’s (with more than 10+ year life left) are around $50 each so drives would set you back $200.
I would still recommend Unraid as the easiest and cheapest solution – easier than your current trial. I too used Synology plus Qnap plus WD plus Win11; and agree with your comments – too complicated and expensive. Buy a used (up to say 5 year old computer with a motherboard that supports m.2 drives – I use Asus Prime B250 from 2017 for example making sure that the computer case is large enough for 4 HDD’s drives plus the 2 m.2 drives = 6 drives the limit for the $50 Unraid software required. You can get such computers for $100 max; just remove the existing drives (except m.2’s) and GPU (since Unraid does not need a GPU). Unraid uses parity for your 4 array drives (your storage of 1 parity and 3 data) and RAID 1 for your 2 cache m.2 drives (your high speed data transfer connection of 3500+ to keep up with your network speed). Your parity drive has to be the largest you will use. I use 4x4TB HDD’s so have 3×4=12TB of data storage. Parity works with any size drive (less than the size of the parity drive itself) so you can start with anysize data drives that you have lying around or get used one cheap so for a 4TB parity drive then 12GB is the max unless you get a unlimited Unraid and a bigger computer case. Or start with a 6Gb parity (max is then 18TB) etc. Right now the 4TB ex datacenter used HGST’s (with more than 10+ year life left) are around $50 each so drives would set you back $200. And yes you can use rsync with Unraid plus dockers for Immich and your photo collection.