Nighttime Adventures with the iPhone 14 Pro
Fall fun in the Windy City
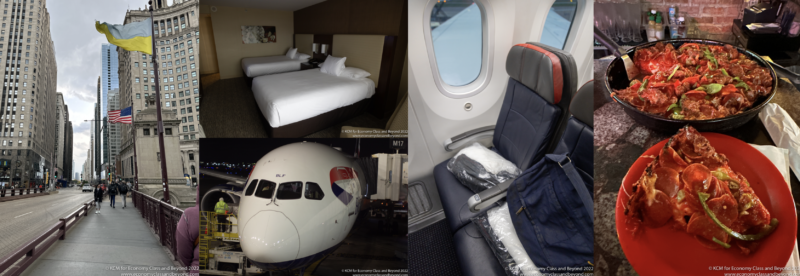
In this adventure:
- Still trying to keep it different
- Great. A Broken Down Coach…
- Cathay Pacific Lounge, Heathrow Terminal 3
- AA99 London Heathrow to Chicago O’Hare (Main Cabin Extra)
- Avid Hotel, Chicago O’Hare
- Hyatt Regency O’Hare
- Airplane Art from the Hyatt Regency O’Hare
- Table for One – Time for Food
- Trying a different Deep Dish Pizza (Pequods)
- Night-Time fun with the iPhone 14 Pro
- Return to much busier Chicago O’Hare Terminal 5
- BA296 Chicago O’Hare to London Heathrow (World Traveller)
- A Coach, A Coach. My Kingdom for a Coach
- Not the end, for 2022… maybe…
It’s time for some Travel Technology – featuring the iPhone 14 Pro and its camera array.
I’m not going to do a full review on the iPhone 14 Pro – there are plenty of other places out there that have written or published their piece on it – instead, I’m going to throw a challenge at the camera – nighttime photography.
Evening and night photography offer challenges to a camera – this is where those wonderful high-speed lenses come in.
The iPhone has three lenses :
- Ultrawide – 12MP Ultra Wide: 13 mm, ƒ/2.2 aperture and 120° field of view
- Normal – 48MP Main: 24 mm, ƒ/1.78 aperture with image stabilisation
- telephoto- 12MP 3x Telephoto: 77 mm, ƒ/2.8 aperture with optical image stabilization.
The lenses also support 3x optical zoom in, 2x optical zoom out; 6x optical zoom range; digital zoom up to 15x. Given there is a sub f1.8 lens in the camera now – it should be able to swallow a lot of light.
But how does it fair in the real world in the cold of a Chicago evening?
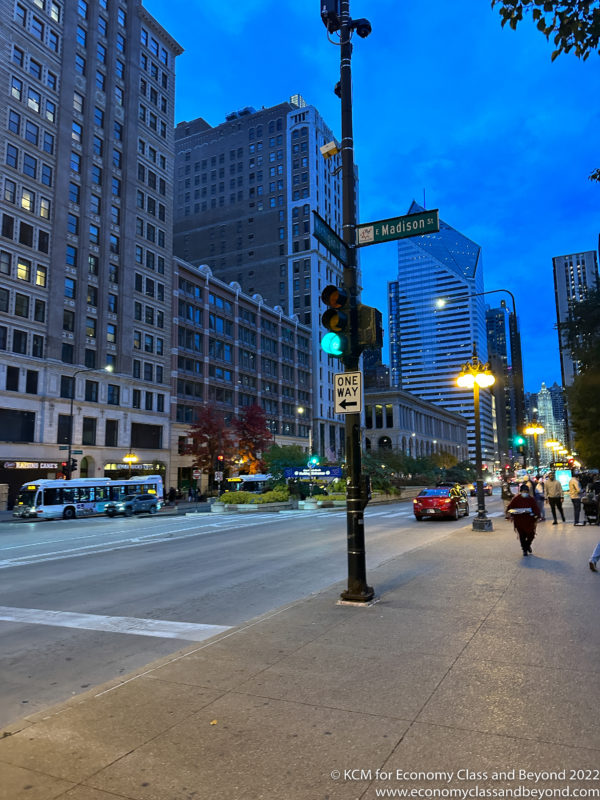
We’ll start on South Michigan Avenue. Whilst things that are fixed do well, the camera has a little trouble keeping up with the moving traffic of the city. Although I’m noticing the camera does love to overexpose the blues it can pick up.
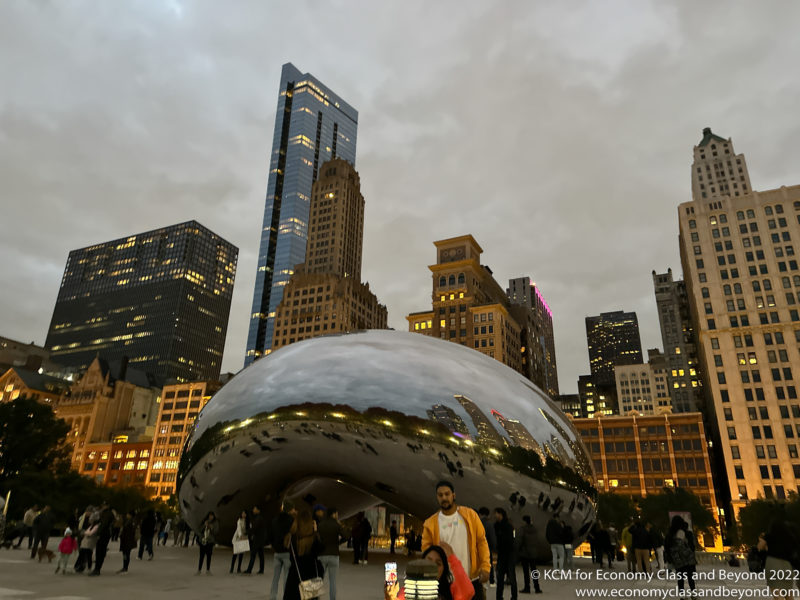
Moving to Cloud Gate, with dull grey light, it seems to handle stopping motion well with the crowds constantly moving. Although the iPhone camera focused more on the grey evening rather than the cool blue tones.
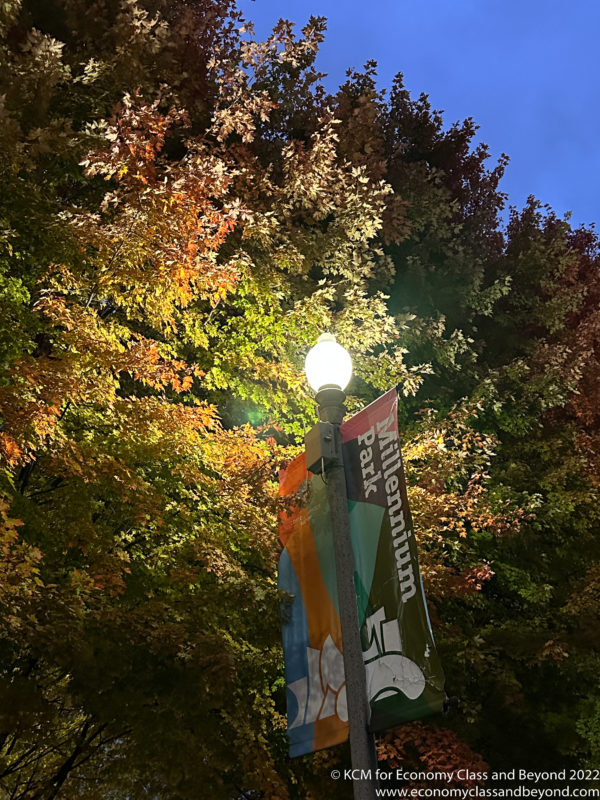
Although if you can find a bit of blue sky, you’re doing well as the camera attempts to self-correct. Again, the iPhone by default loves to overcorrect blues.
Let us check the 3x the camera offers. I’ll be going from an ultra-wide, through each lens (excluding the 2x zoom – that’s just using 12 megapixels of the 48-megapixel array on the main lens).
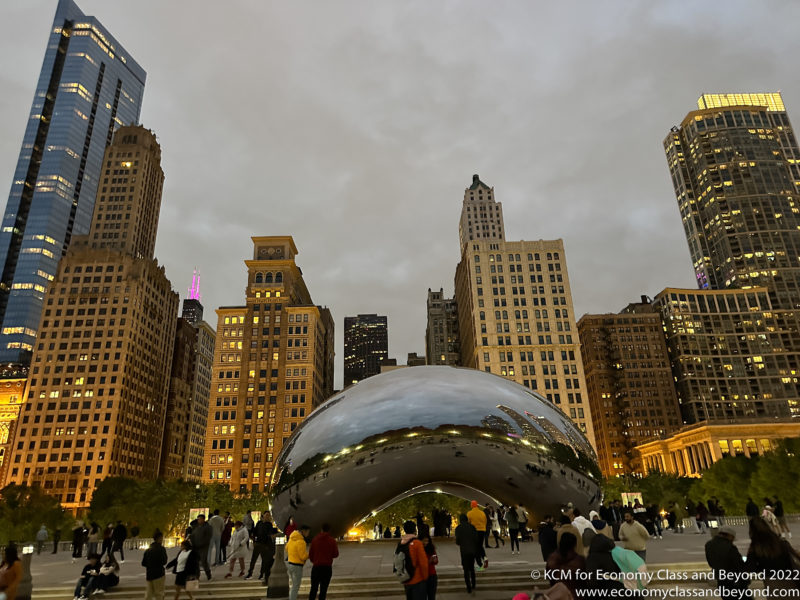
Ultrawide
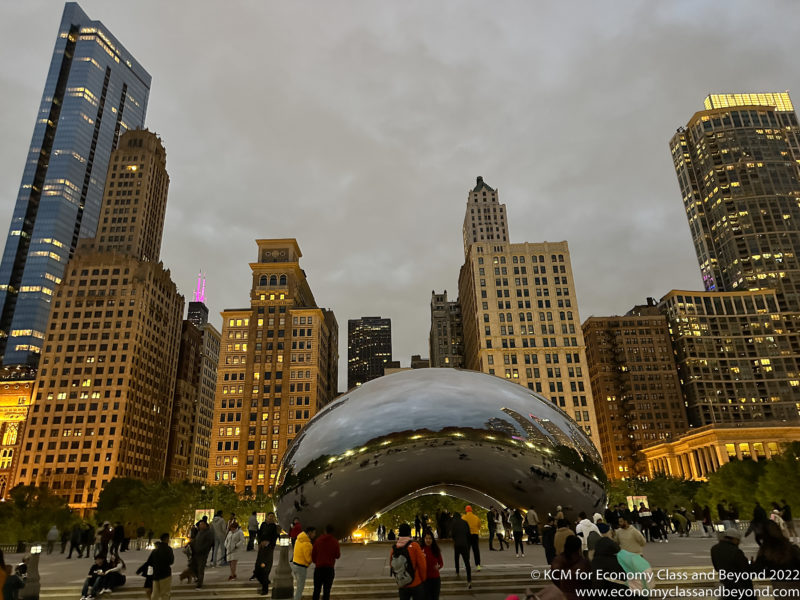
Normal
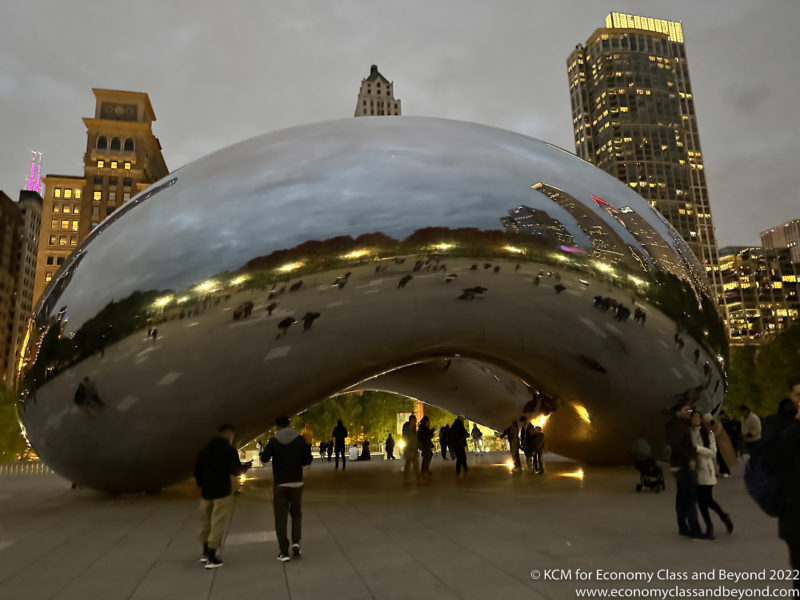
3x Zoom
The main lens is still the most capable, as you can see from this image, catching the grey of the cloud, with the blue dusk coming in nicely.
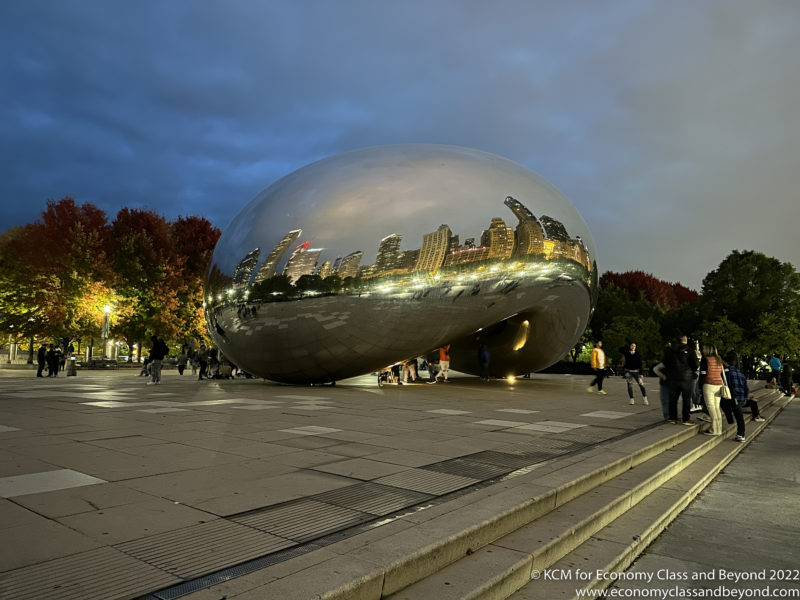
With it darkening a lot, let us proceed down South Michigan Avenue. Like most lenses and sensors, the camera feeds off light – with it being able to freeze action very well in this image.
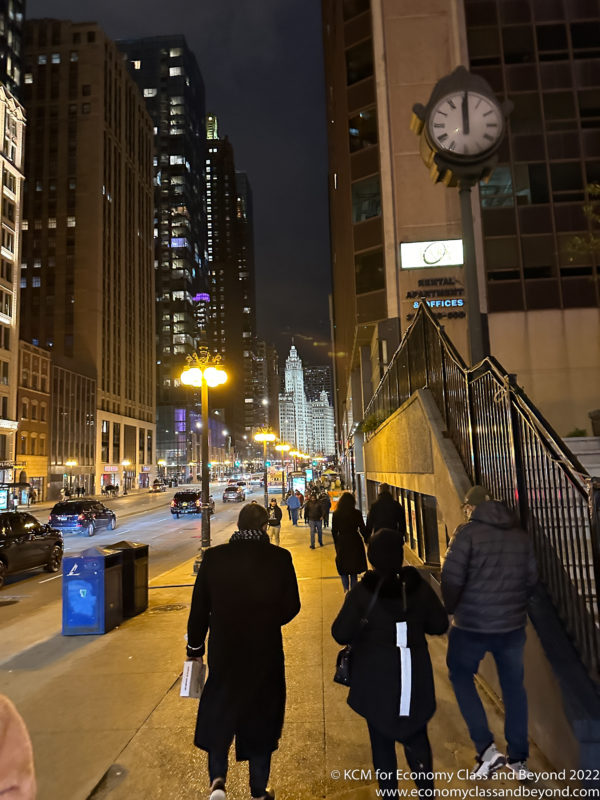
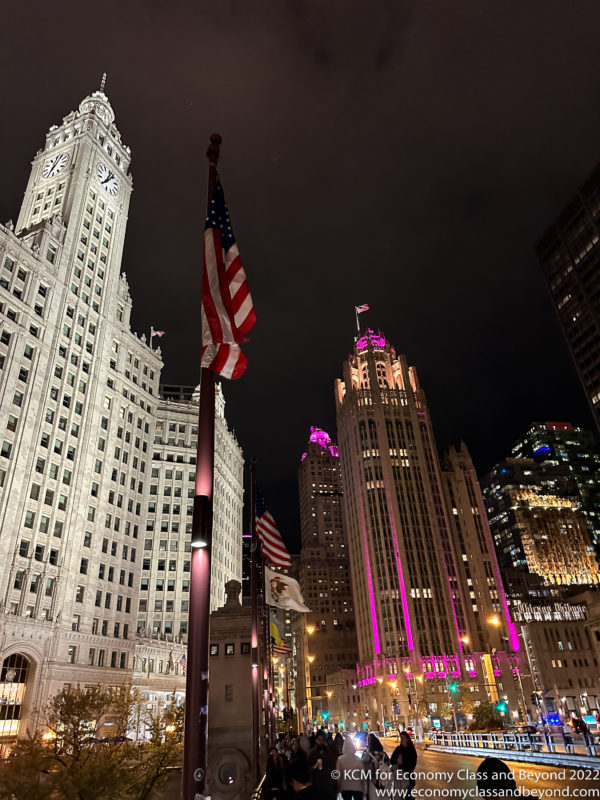
Crossing onto the bridge of North Michigan Avenue over the Chicago River, there’s a lot of light for your nighttime architectural photography needs. Again, shooting with the main lens will give you the best chance of swallowing every lux of light it can get.
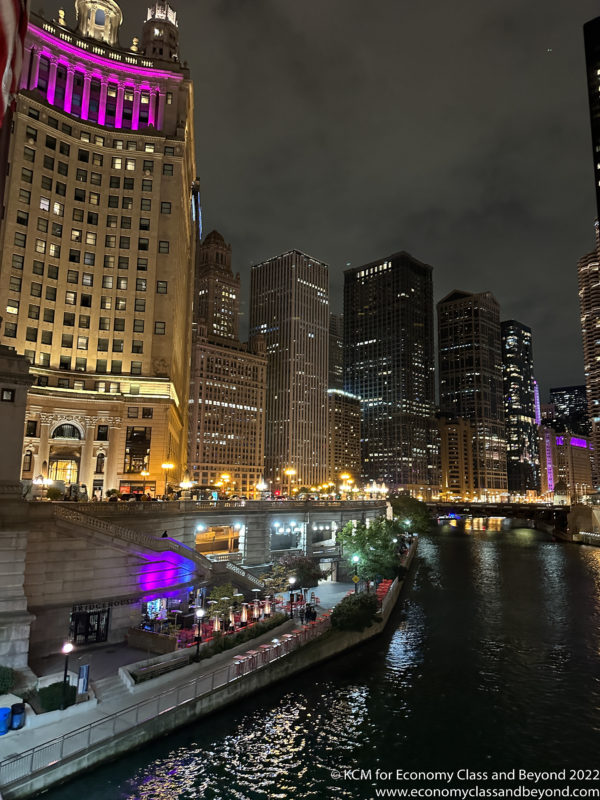
Even mixing darkness with the Chicago river can add some depth to a photo.
With limited light as you look upwards, there are challenges. However, the lenses performed ok here. Just remember to stay still if you want those crystal-clear images. The iPhone does help here with its long exposure functionality but it requires an important skill – keeping your hand still for a second or longer.
And trust me – that can be harder than it sounds (coming from someone who is used to holding DSLRs for 1-2 seconds and hoping the images are not blurry as hell). Yes, the smaller form factor and much-reduced weight help here a lot – but it can be challenging.
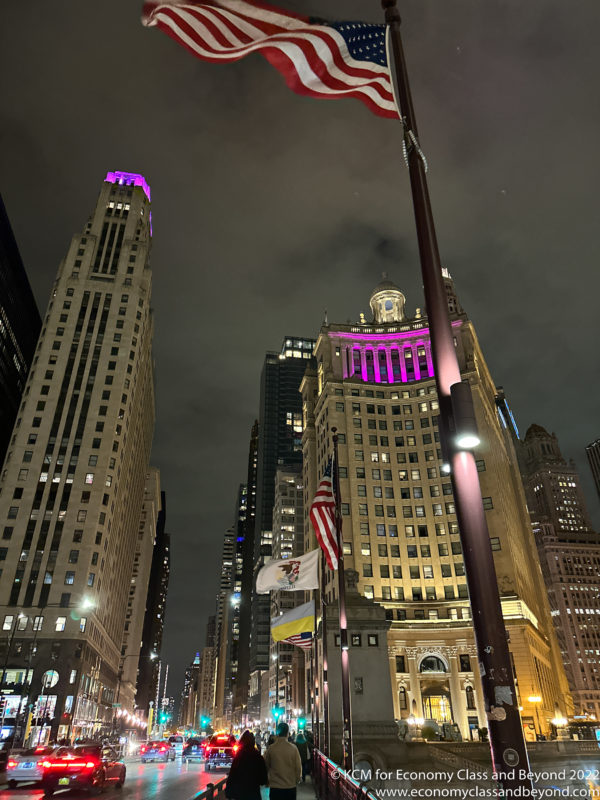
One of the problems that iPhone cameras have had for… *lost track of the years* is the internal reflections the lenses sometimes give off. Sadly, nothing has changed with the coatings, giving off annoying marks as you can see in the top right of the image.
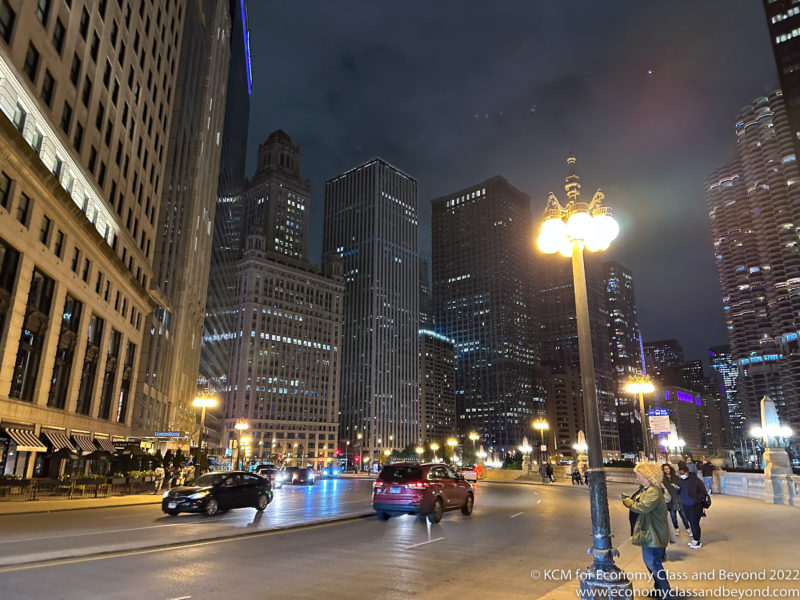
It’s something to be aware of and does sometimes force a change in how you shoot, or the joy of post-processing in Adobe Lightroom/Photos/Your App poison of choice.
ProRAW? RAW? DNG?
One thing that Apple has finally done is to expose ProRAW (Apple’s RAW image file format) to its user base in the native Camera app. This is great for someone who endlessly enjoys playing with Digital Negatives when time allows. Digital RAW files allow a photographer to dive beyond the basic camera settings, whilst playing with a file content to their heart’s content.
Sadly, Apple hasn’t learned the meaning of CRAW yet (Compressed RAW). Here is what is inside Finder when I imported my photos over:

Excuse me: near enough 70Mb per night photo? Even uncompressed RAW out of my EOS R doesn’t hit that hard, with the largest I’ve encountered around 50Mb, and with CRAW applied, around 21Mb per file.
Certainly, a lot of room for optimisation.
It also means for those who work in ProRES or ProRAW will need to heavily over-specify the storage requirements for their iPhone14 Pro, because the 128Gb base-level unit won’t be able to take constant 70Mb files (and I’ve seen reports of files scaling as high as 125Mb per image).
The ProRAW output thankfully comes encoded in Adobe DNG (Digital Negative), rather than a proprietary format – which is something to be grateful for (with Casio, Lecia, Pentax, Ricoh, and Sigma being those who use it as an option in their camera software. With DNG controlled by Adobe, but made available Royalty Free, it’s one way to ensure we don’t hit the joy of closed formats and file obsolescence.
File Obsolescence is a real risk as we move forward in the digital world, with experiences being lost as servers are shut down and support files vanish (one need only look at the games industry where a server gets switched off and the experience vanishes). It’s happened more than once in the commercial space as application vendors drop support for products – even to me (I used a tool called Writed, which has dropped support for the application being available in the UK – so I had content trapped in an application I could no longer access).

Yep. Obsolescence is a thing. Even with modern software.
Thankfully, I had a copy of the installer, so I could bring it to my current device and get content out.
Whilst I don’t advocate switching entirely to DNG, it’s something to bear in mind – even if the file specification is from Adobe (and they’re guilty of sending features and products to obsolescence as much as anyone out there – the recent Pantone drama that’s happened), it’s a better solution for now.
Where was I? RAW iPhone files.
So all I’m doing is tweaking the photo in Adobe Lightroom – as it can handle and read DNG files without issue.
Here’s the plain RAW file as it came in.
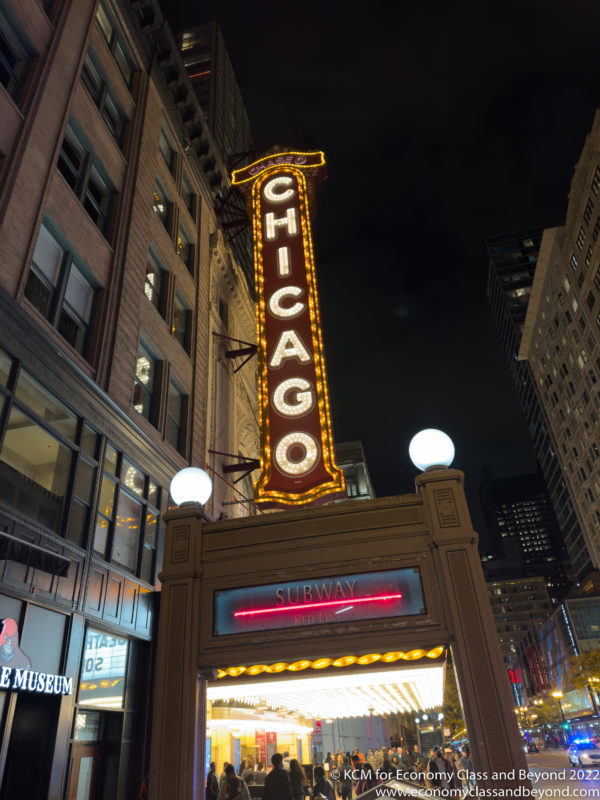
Well, there’s one problem that needs a fix – we’ve got the joy of lens reflection, with a stray white dot (Its upward of the right-hand globe). Let’s use the healing tools to blend that out of the way.
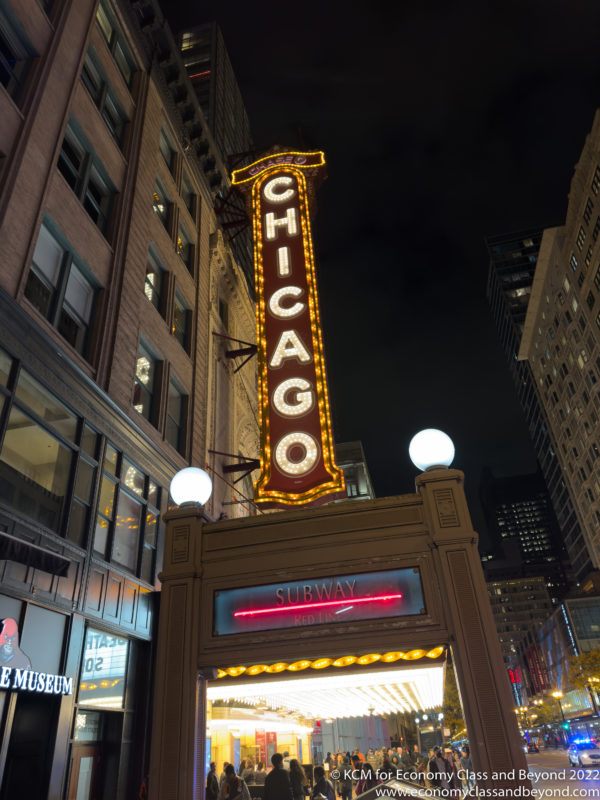
Well, the spot removal makes me happy. Your mileage will of course vary.
With that done, Lightroom has tools to help us along and we’ll use the Auto Tone and White Balance Correction, to allow for the fundamental corrections to be carried out. It’s also picked out a ProRAW profile to get us started.
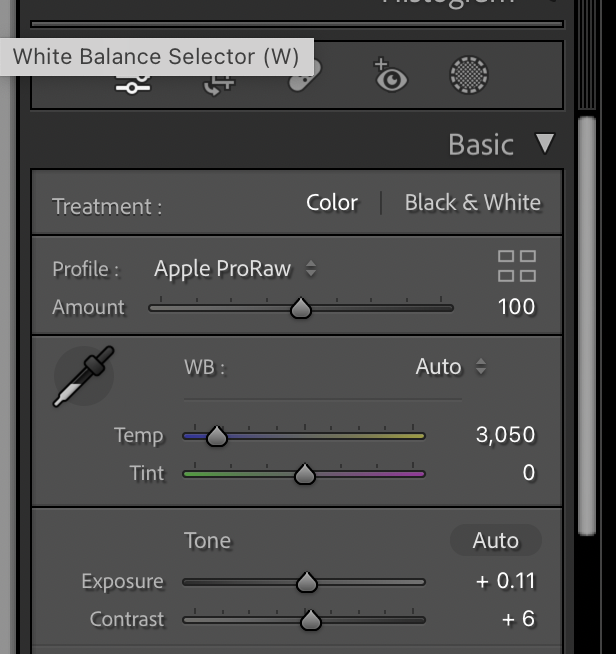
From this, we get the following image.
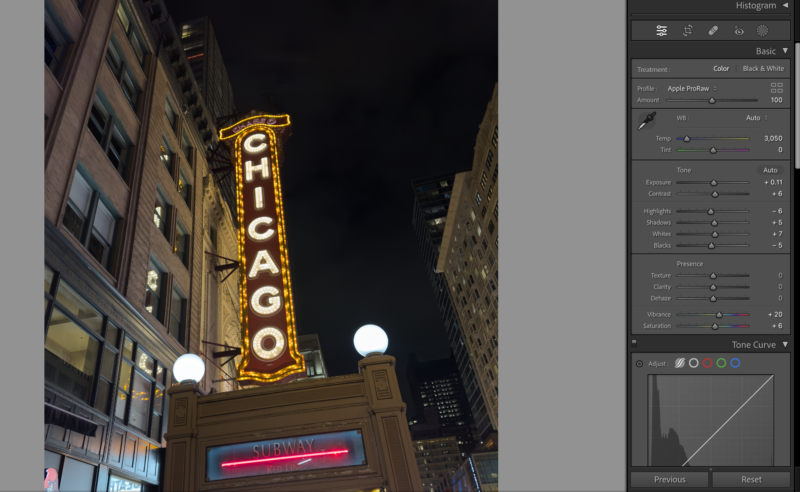
Now comes the tweaking. From here, it’s a case of running riot and exploring, be it through your own settings – like I’ve done here:
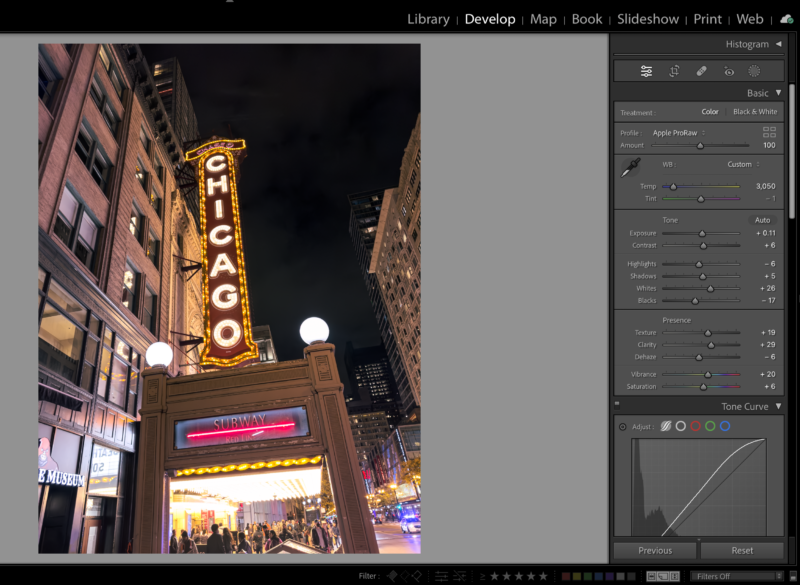
Which gives this output:
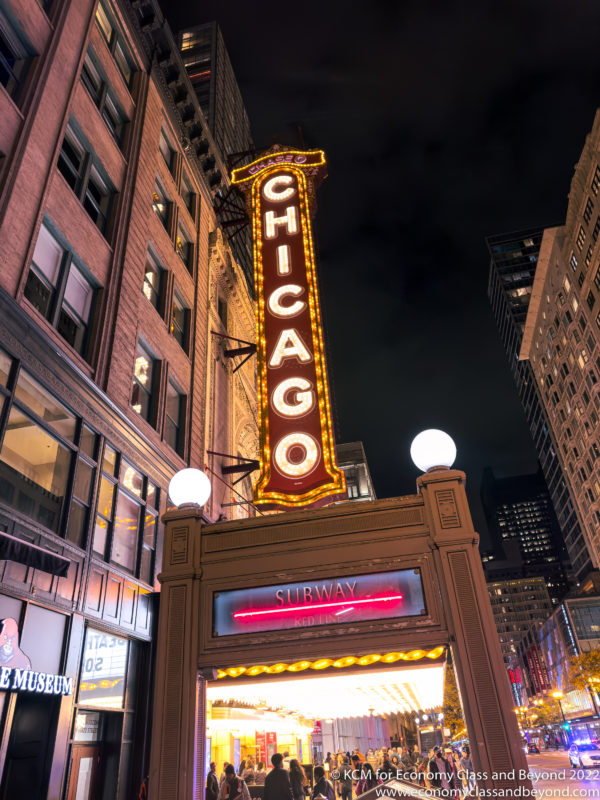
I’ve gone for a much punchier output, with brighter reds, as well as boosting the exposure to show off more of the building the Chicago Theatre sign is mounted to.
Of course, Lightroom has a bunch of built-in filters and presets. I’ve used some from the Urban Acrtieture Preset pack in this demonstration.
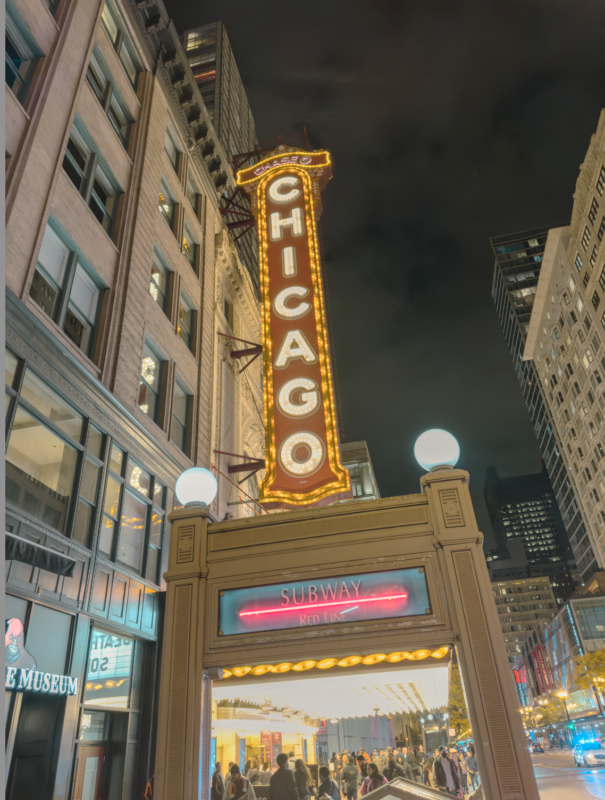
I’ve also tried one from photographer Sam Nash’s preset packs that I tend to use for portrait use.
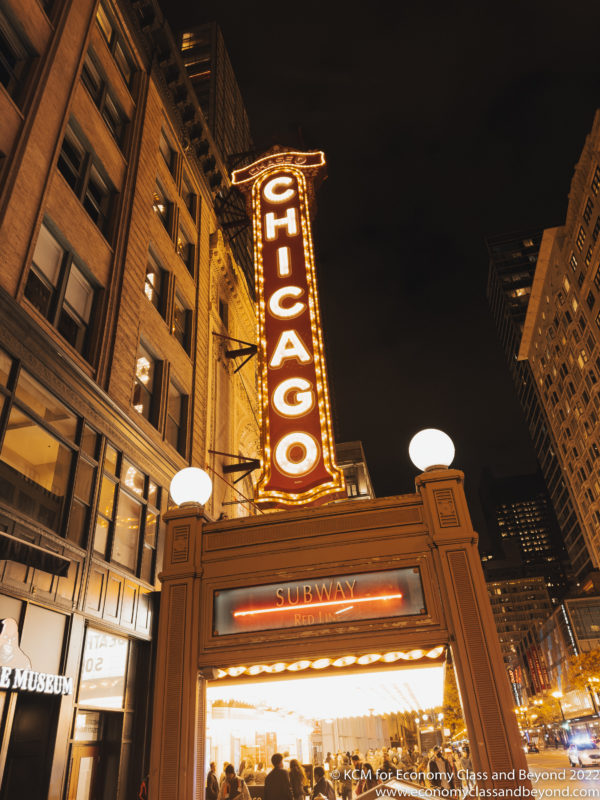
RAW Files allow you to go into detail too – remember what I said about the iPhone reflecting light? Let us take a closer look at the crop here.
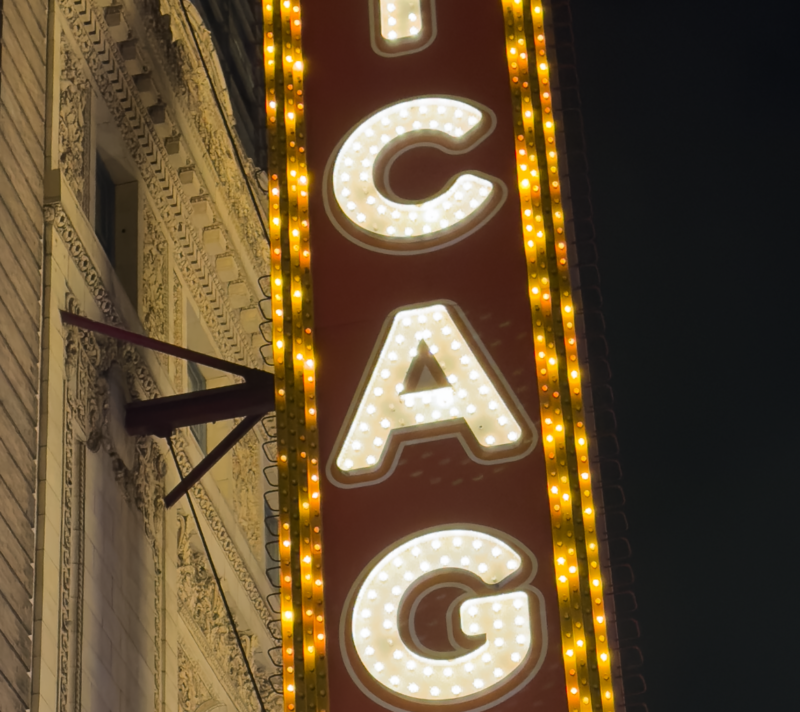
If you look at the A, you can see the highlights of the G below reflected upwards – making it rather annoying. t’s something you’ll start to spot when you’re pixel-peeping, but also something to be aware of when working with a larger sensor. The iPhone’s lens coating still can’t help you here, sadly.
The thing with a Digital Negative or RAW file, it brings flexibility. As a photographer or image editor, having that flexibility is so important if you are investing time into a project, or need to have control of what you want someone to see…
Thoughts
If you’re coming from an iPhone 13 Pro, this might not be the upgrade for you that you might expect – yes, the camera bump has grown to hold its new lens array. And they’re perfectly capable cameras that can really deliver a punch at night – a challenging subject when working with a camera of any sort. I’ve come from an iPhone 12 Pro – so the differences are there and welcome (I tend to stick to a two-year upgrade cadence cycle, which put an Apple employee into shock when I brought this device).
Giving it two years between cycles allows for new technologies to mature, as well as appreciate the changes – as well as funding new cases to keep the phone safe.
There are compromises – whilst the sensors have improved, the lens coatings are still far too vulnerable to flare, requiring either a lot of care when shooting, or being prepared to spend the time post-processing to correct.
I’ve got a long time to go with this iPhone 14 Pro – but I’m happy with the results it’s giving – and in photography, being happy with a camera is important.
Even if it’s the one attached to your phone.
Photographer Chase Jarvis once said,
“The best camera is the one that’s with you”.
Having a camera phone gives you the flexibility to have that ability to capture the image you want without having to reach for a big rig and spend time setting up things.
Having a camera phone you can control and manage will help you on the way. For me, the iPhone 14 Pro camera meets that requirement.
Just make sure if you can buy one, get one with as much storage as you can afford unless you want to be held hostage to iCloud fees.
Next: Who the hell invited all these people here? Back to a busier O’Hare Terminal 5
Welcome to Economy Class and Beyond. Your no-nonsense guide to network news, honest reviews, featuring in-depth coverage, unique research, as well as the humour and madness I only know how to deliver.
Follow me on Twitter at @EconomyBeyond for the latest updates, as well as Mastodon too! You can follow me on Instagram too!
Also, remember that we are part of the BoardingArea community, bringing you the latest frequent flyer news from around the world.