Data Storage Adventures – With UGreen NASync 4800
Part 5: Make my Storage Monster Grow by adding an Extra Hard Disk
To quote the most wonderful Rita Repulsa, MAKE MY MONSTER GROW!
- Part 1: Some Background and “Why Now?”
- Part 2: Which NAS to go for? Some thoughts and design work
- Part 3: Building, Configuring and Deploying the UGreeen NASync DXP 4800
- Part 4: Data Transfer Tips and Tricks
- Part 5: Making this storage monster grow
- Part 6: Backups still matter, along with some more background reading
Expanding the NAS storage solution
For those who need a refresher, I initialised the UGreen NASync DXP 4800 with two 16 TB disks (which format down to 14.7 TB after overheads and a RAID1 configuration)
This is just about my current core data consumption on my current Drobo. But the aim of this solution is not to match but to grow my storage capacity – and hopefully allow the solution to run for another five years.
To do this, we’re going to add a third disk to the UGreen NAS and bring it online and into the main storage pool.
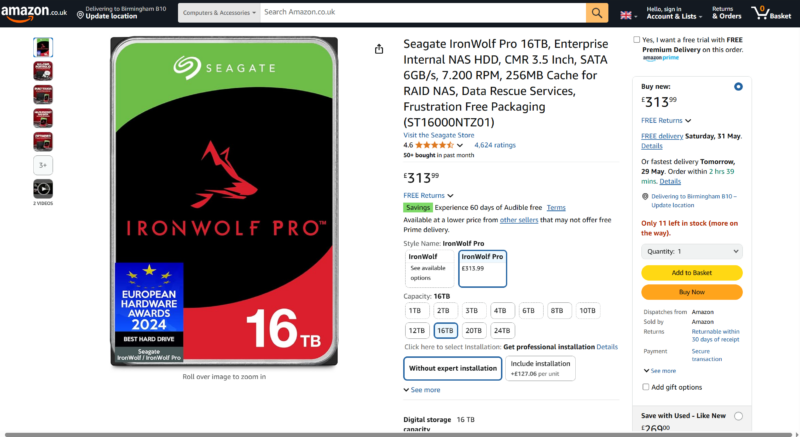
Once again, I’ve secured another Seagate IronWolf Pro 16 TB disk.
This should be the last disk… for now.
I could have chosen another brand or a refurbished drive… but I might as well keep things the same and try to keep this array pristine.
There are some outstanding arguments for refurbished drives these days (in terms of cost saving and balance of risk in a RAID), provided you get them from a qualified vendor. Sadly, there are too many marketplaces (Amazon, eBay and so on) with vendors that will sell used drives “As-New”, wiping out the drives’ S.M.A.R.T. data. If they were mining Chia coins or being used in a data farm, that’s going to impact the life of the drive, in terms of power-on hours and exceeding drive threshold Mean Time Before Failure limits.
Because when the S.M.A.R.T. data indicates the drive is going to fail, it’s a little too late – the drive is toast. If the drive has data on it, wave goodbye to it.
Amazon did an Amazon, so the package containing the disk arrived late (and at the wrong address), and had to be picked up from my local Post Office instead of where I wanted it delivered.
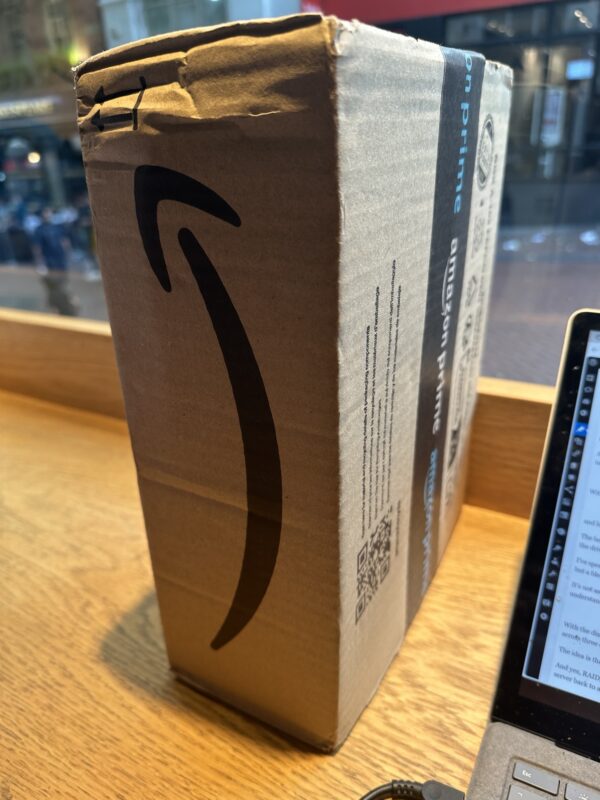
I wouldn’t expect the external Amazon box any other way.
With the drive collected, it was taken home for insertion (after a mug of coffee and an edit session).
Here’s the drive unpacked from Amazon.
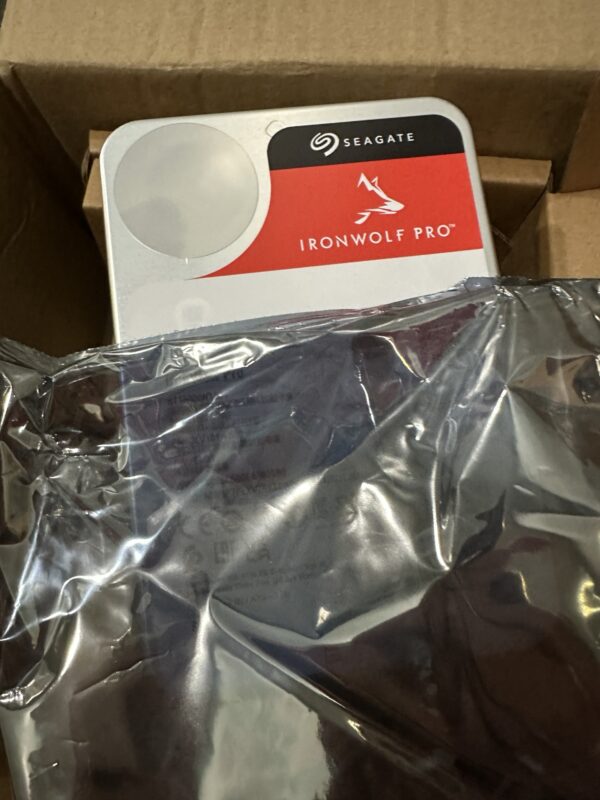
Another 16 TB ready to slide in. No, you can’t steal the serial number. Go away.
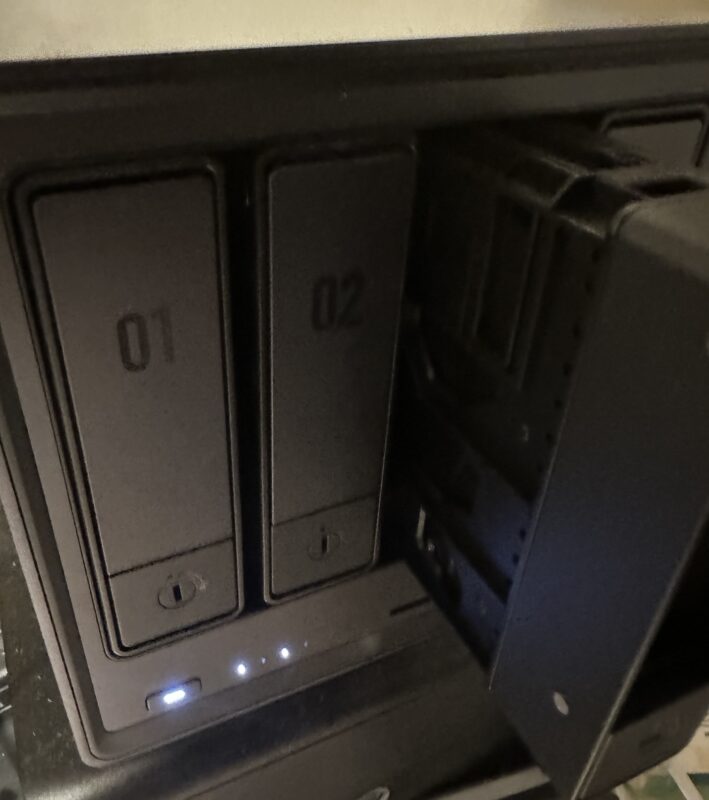
It’s a case of removing Caddy Number 3 from the NAS, unpacking the drive, inserting it into the caddy, and then reinserting it into the NAS.
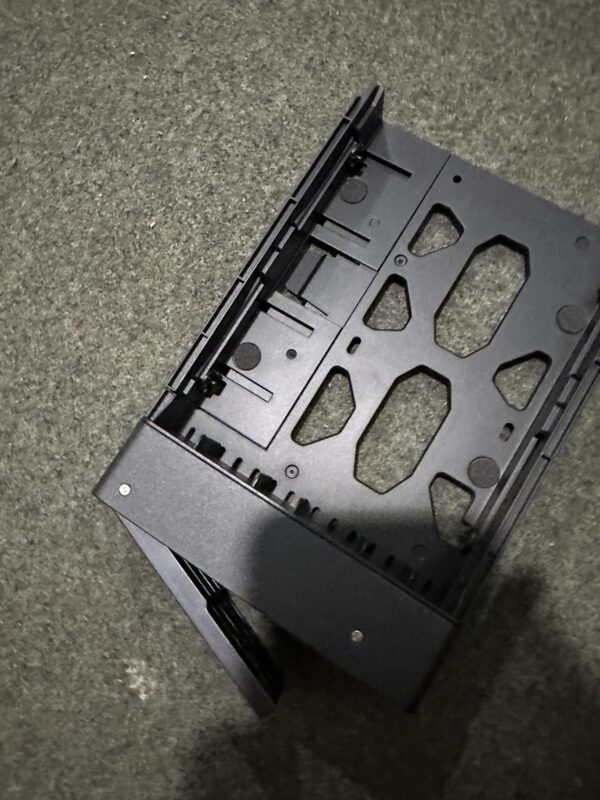
The Caddy
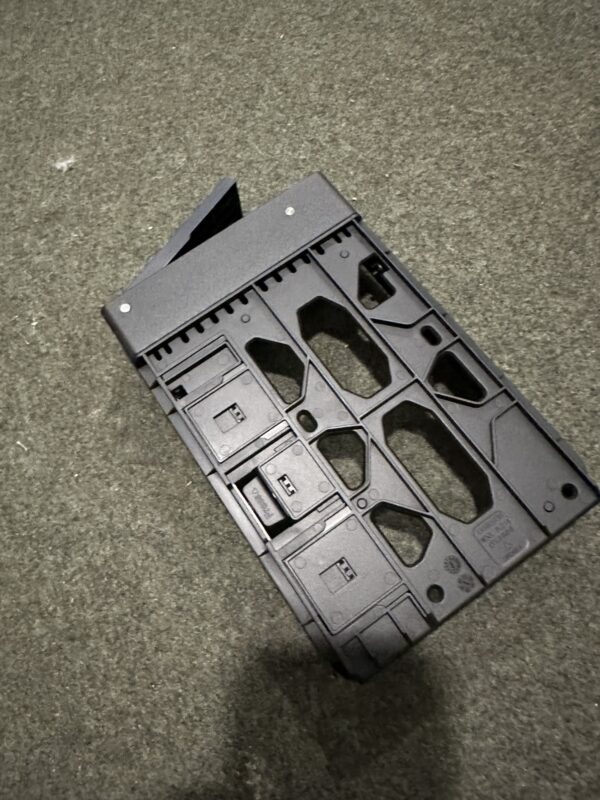
Press to pull apart, pop in the disk, and snap back together. If you’re mounting a 2.5″ SSD, you’ll need to screw them in.
I’m going to follow the UGreen NAS Knowledge Centre article to help me deploy this drive.
The beauty of a solution like this UGreen NAS, is that you can hot-swap drives in and out without powering down the NAS (meaning you don’t have to power down the server, insert the drive and power it back on).
Inserting the loaded caddy into slot 3. These have mechanical locks on them to prevent removal. If you keep them locked will depend on your circumstances.
I’ve spent enough time in server rooms to know that a hot-swappable drive is both a curse and a blessing. A curse in that you know that a drive has failed, but a blessing that is visible to see both in software and hardware, and doesn’t require a critical service to be powered down to allow replacement (providing other disks in the array are still up and running).
It’s not as important in the home environment, but it is still an important thing to consider, especially if you’re getting into pro-IT solutions (and understanding why that HP / Dell / Supermicro / Lenovo servers costs multiple arms and legs), or want a bit of ease of use in the home.
However, before plugging the new drive in, I ensured that there were no big Read/Write operations going on the NAS, with only minimal activity in flight. Whilst these operations are not as delicate as they were in the past, there is no point tempting fate.
Logging into the NAS, there was an update queuing. Before attempting to commit the disk to the RAID, always do updates first. Also, at this point, I wish I had an Uninterruptible Power Supply (UPS) to keep the process going safely in the unlikely event of power going out.
There was also another to-do – a few sofrwre updates were queuing. Before I got on with expanding the disk, it was time to do some software maintenance.
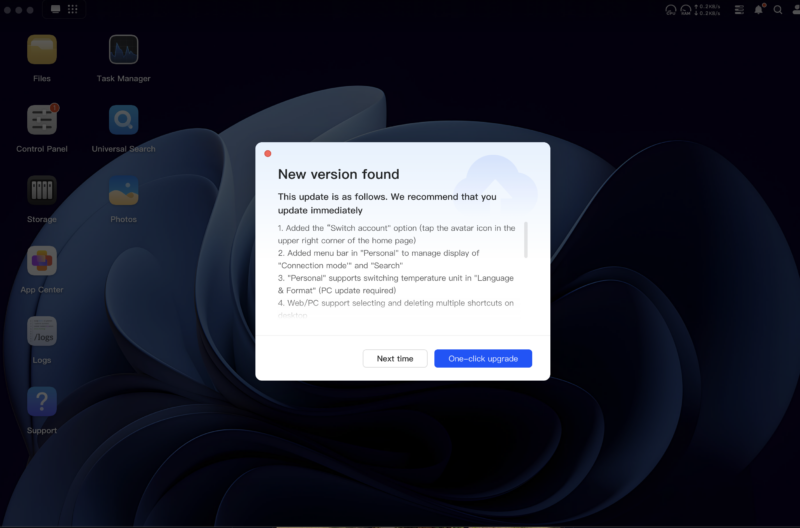
The first upgrade…
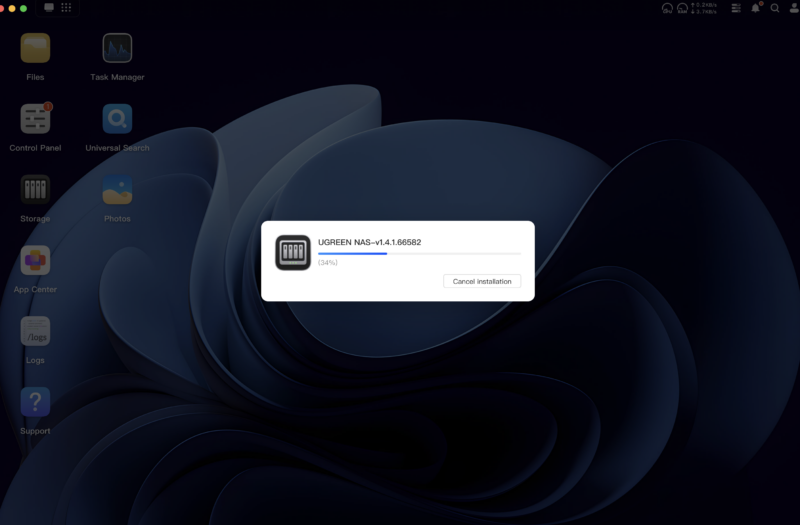
Tum tee tum..
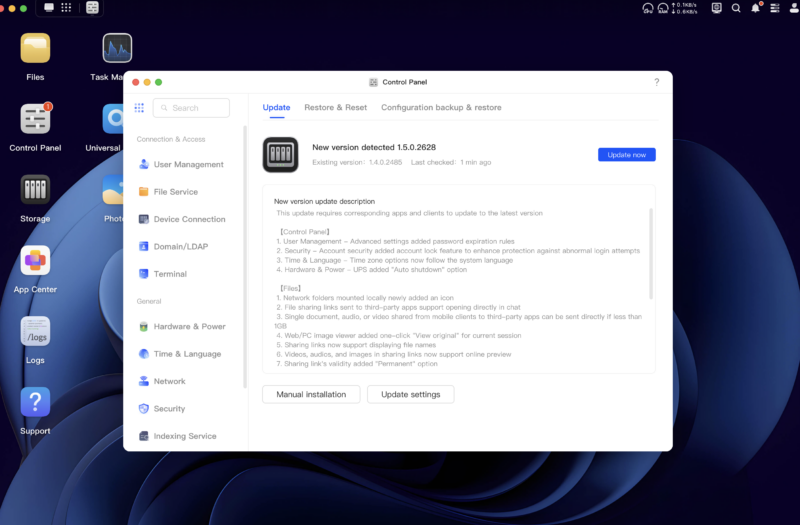
And the second major upgrade, whilst we’re at it.
There are various schools of thought when it comes to patching software:
- Do it straight away
- Wait a few days
- Never do it
I’ve always been minded to the “wait a few days” strategy, unless there are known Zero-Day attacks underway, mainly as some updates can cause issues rather than fix them. And yes, everyone in the industry is at fault for sending out a dodgy update, no matter how big you are (we remember the issue with an endpoint update that knocked Delta Air Lines hard).
For client devices (such as laptops and desktops), I would normally wait up to a week. For phones, at least two weeks (or until the first “decimal” release is made – Apples fresh releases normally have bugs). For servers that are exposed to the internet, it’s very much a risk assessment. Then it boils down to mission requirements and shutdown windows.
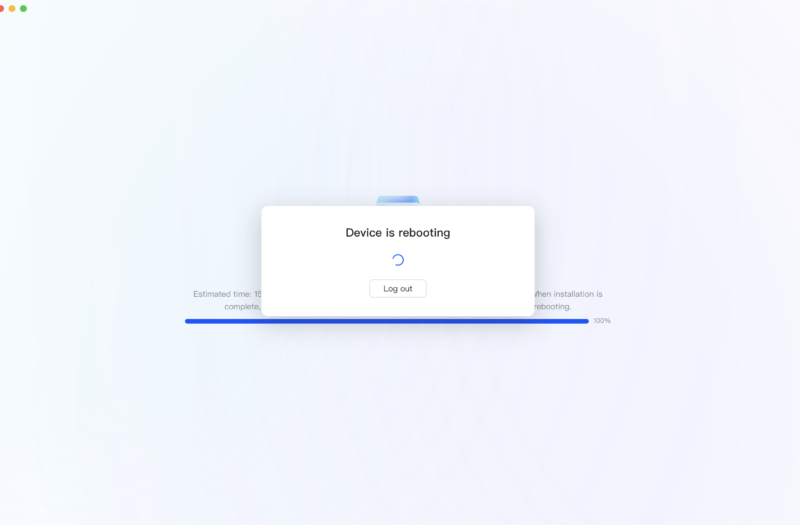
Which required a reboot.
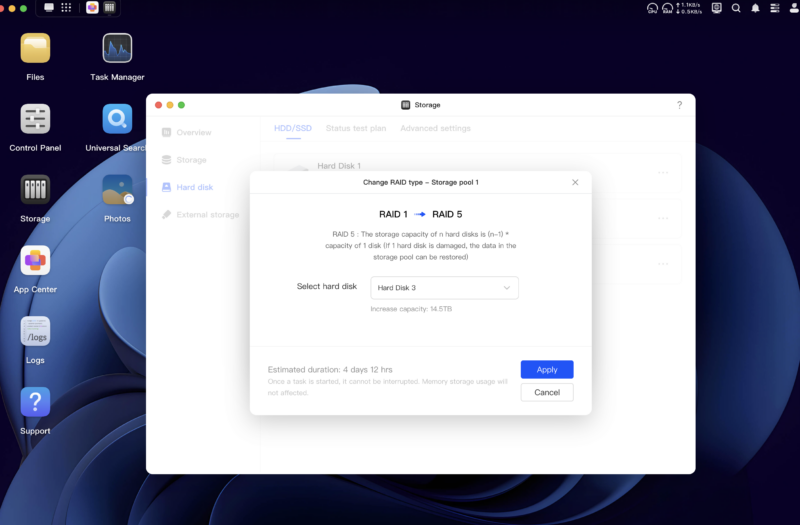
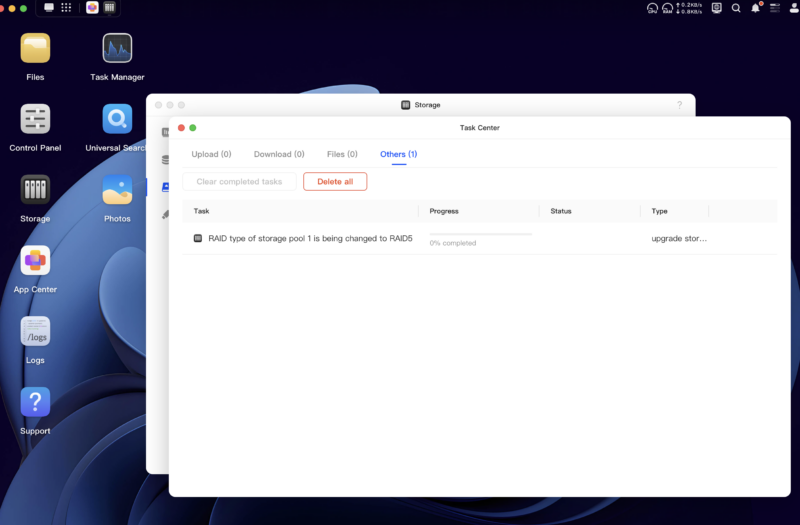
With the disk in the drive, it was time to migrate my RAID1 to a RAID5, which converts the server from a mirrored disk storage to full data striping across three disks (with the obvious hit to reallocate resources around the disks).
I know I have updates. But I want to work on the drives first
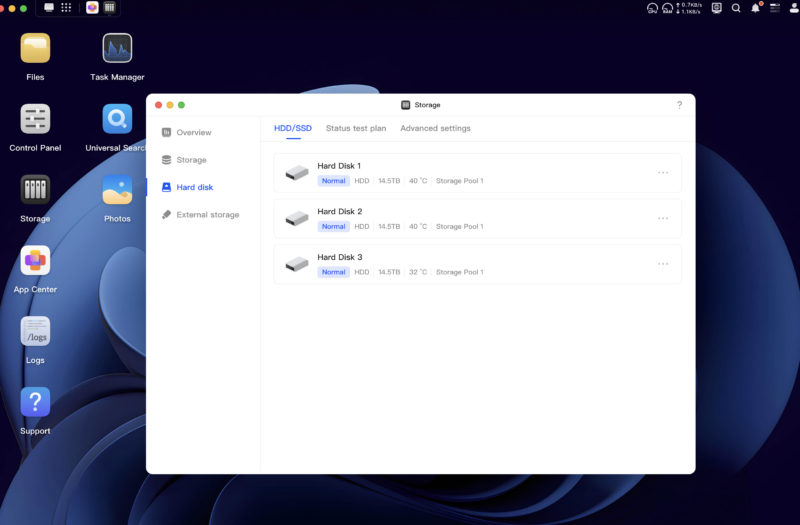
Going into the Storage Manager, I can see that the third disk has been recognised and that it’s ready for deployment.
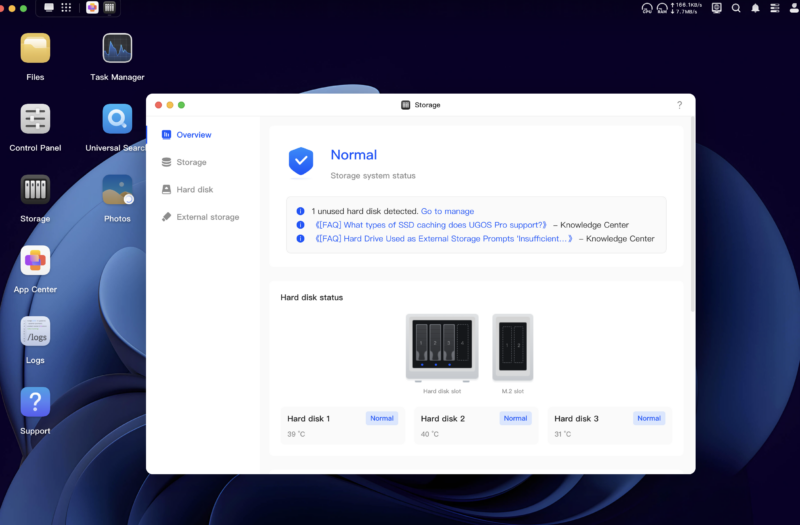
Let’s dig into the disks and see what’s going on. Disk 1 and 2 are in storage pool 1 (the RAID1), whilst Disk 3 is unused—time to change that.
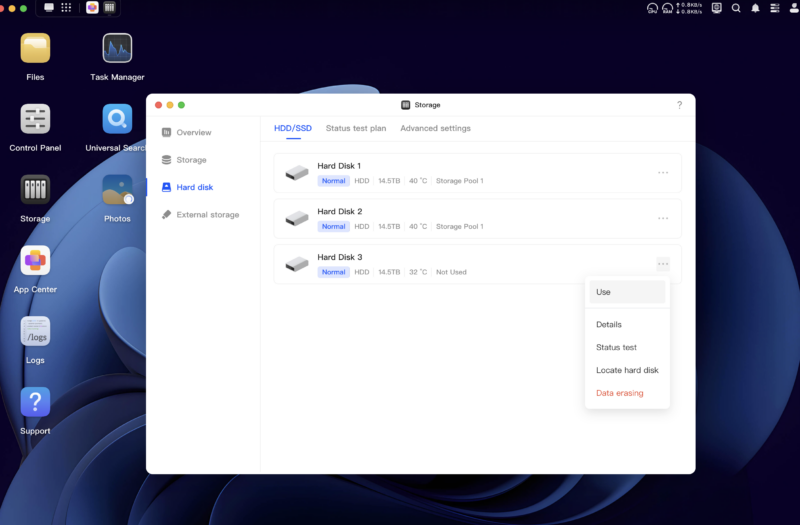
Let’s click on Use to work on Disk 3.
I’m given a bunch of options here, from creating a new storage pool, adding it as a hot spare in case a disk dies, to changing the RAID type. or upgrading, replacing a disk in the pool.
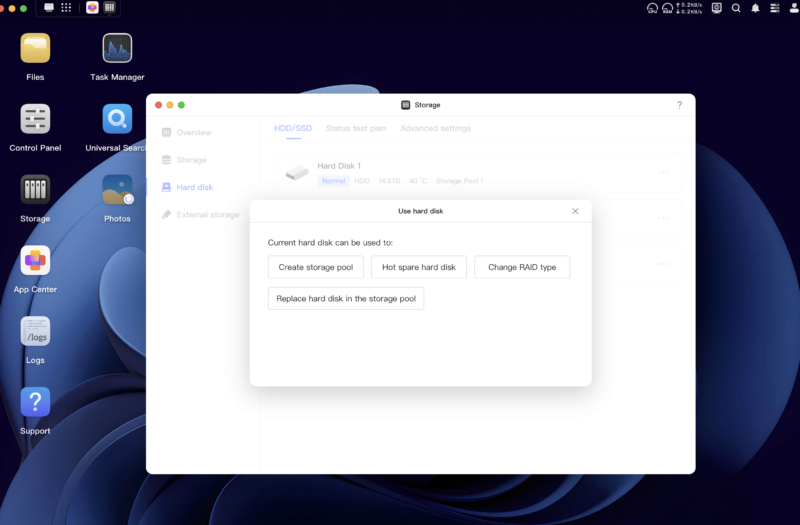
In my case, I’m heading to RAID Expansion. Given I am at a RAID1, my only move is to head to RAID5, which stripes parity data across disks, and will allow the equivalent of two out of three disks to be utilised for data.

With this, I can add the disks I want to add to the storage pool.
It’s getting to the final questions – if this disk had data on it, I’d be kissing it goodbye. As it’s out of the box, factory fresh, I’m clicking Format to initialise the disk.
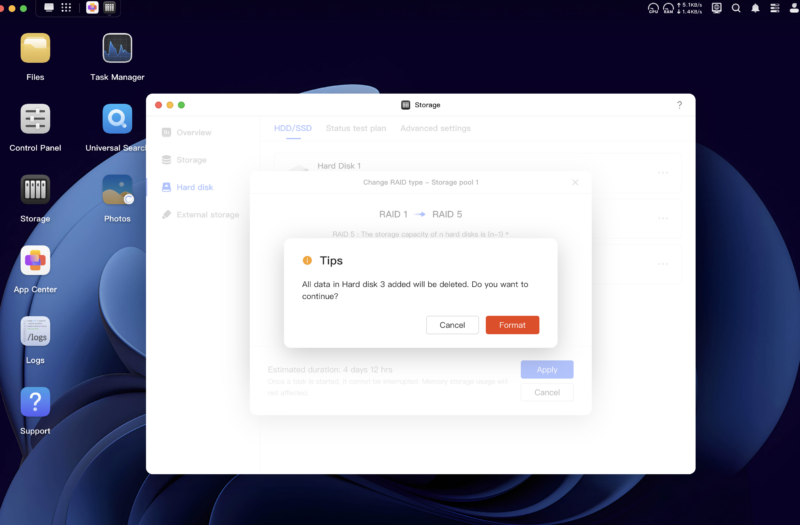
With an administrative credential needed to commit the task, the disk is added to the pool.
There are some big dangers during this, as disk building, repairs, and reallocation take time. For my disk set, they would be hammered straight for the best part of five days. Whilst I’m confident that will be fine for these, for older disks, I’d be a little more wary. Certainly, if I were to add a fourth disk, I’d be doing it this year, rather than waiting longer than that.
After all, the healthier the drive, the less the risk
Get comfy. This takes time.
Remember, the highest risk of failure is during disk builds/rebuilds, as the drives are under constant read/write. If you’ve gone for cheap drives, you’ll know about it soon enough.
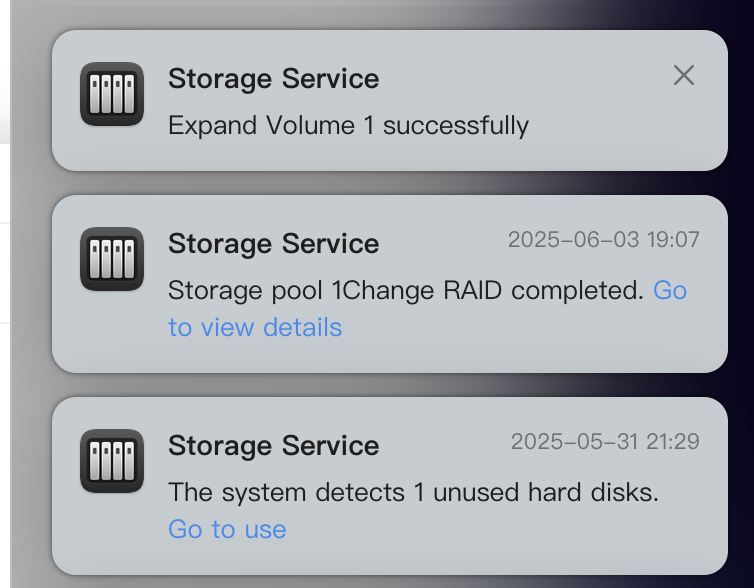
For me, whilst the estimate was near five days, it was nearer three and a half days for the data reallocation to be completed. After the disks’ non-stop chattering for days, they fell quiet.
About 30 minutes before I got home, the rebuild process had completed successfully. With the space now available, I allocated the available storage to the pool.
And lo! 29 TB available for Read/write purposes, with around 3 TB lost to formatting and, of course, the capacity of one disk to allow for failure.
All functions complete…
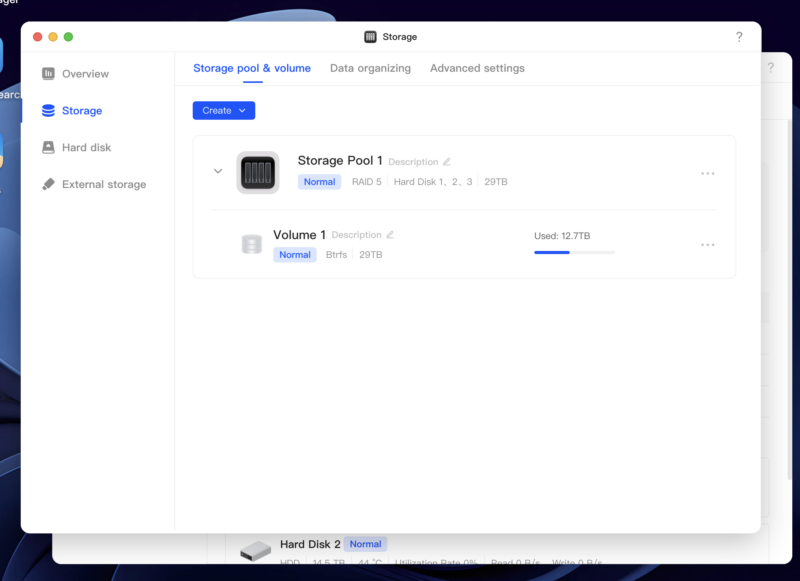
And all disks now integrated into a single volume.
With the rebuild and synchronisation completed… I could finally breathe a sigh of relief
But… what next?
Next:
Some thoughts.
Welcome to Economy Class and Beyond. Your no-nonsense guide to network news, honest reviews, in-depth coverage, unique research, as well as the humour and madness I only know how to deliver.
Our Social Media pool has expanded. You can find us across most networks as @economybeyond on BlueSky, Threads, Mastodon and Instagram!
Also, remember that we are part of the BoardingArea community, bringing you the latest frequent flyer news from around the world.